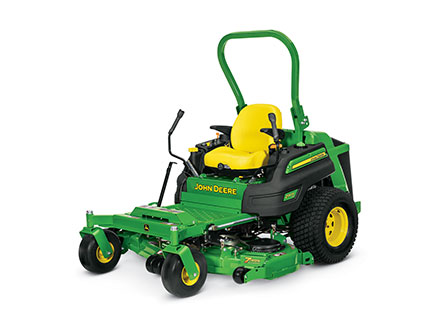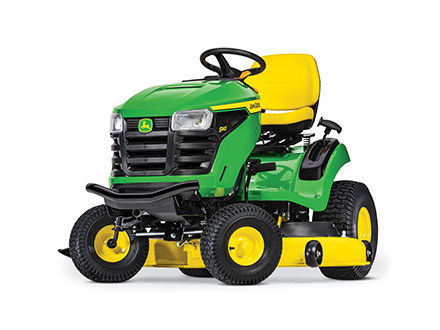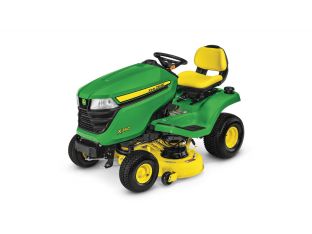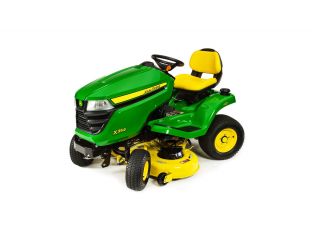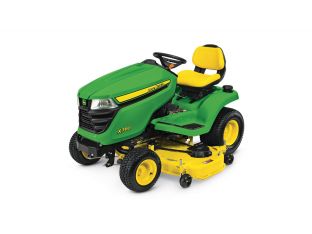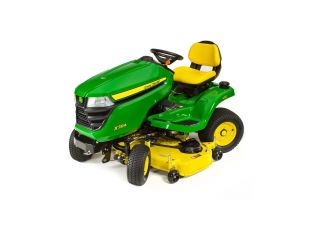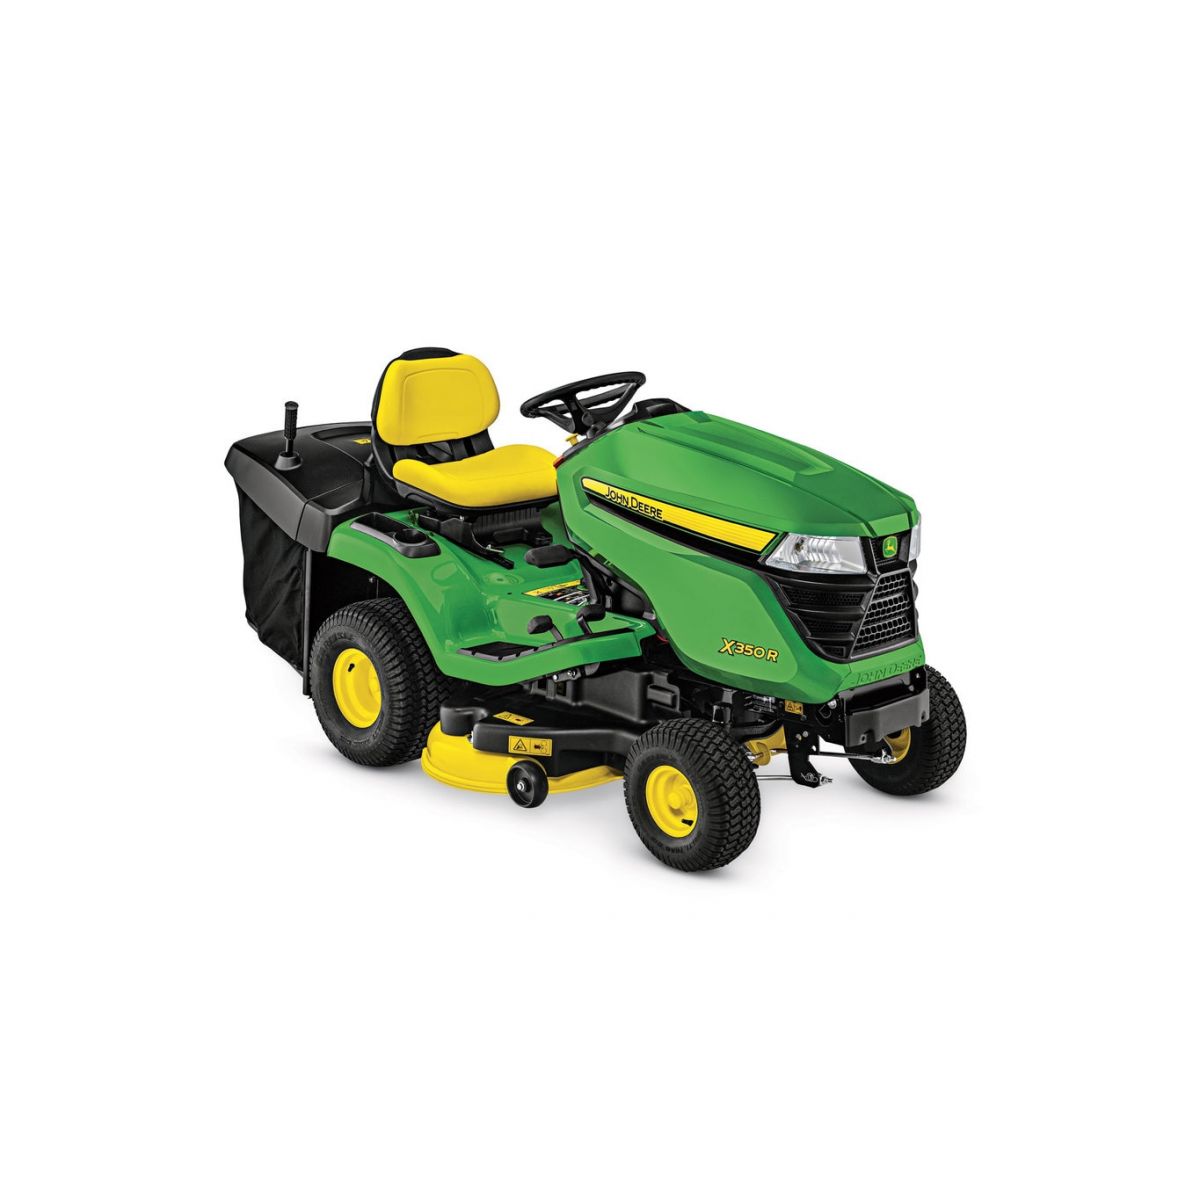
X350R
Ride-on Mower
- 16 kW (21.5 hp) V-twin iTorque Power System
- 107 cm (42 in.) Edge™ Rear-discharge, Rear-collect Deck
- Hydrostatic Transmission
- Mow up to 1.4 ha (3.5 ac.)
Features
Engine is smooth-running and reliable V-twin air-cooled design
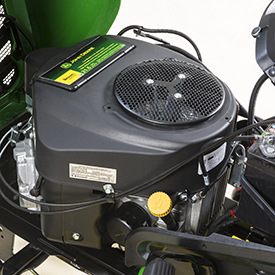 16-kW (21.5-hp) V-twin engine
 The tractor is powered by a John Deere iTorque Power System, a combination of engine features and an exclusive hood design that provides superior lugging ability, even cooling, and durability.
A large 726-cc (44.3-cu in.), 16-kW (21.5-hp) engine has plenty of power and torque for superior performance. The larger, more powerful engine also allows the engine in the rear-discharge tractor to be operated at a lower 3100-rpm speed for quieter operation.
Key engine features include:
- 16-kW (21.5-hp)
- Large 726-cc (44.3-cu in.) displacement
- Quality features include:
- Cast-iron cylinder liners
- Overhead valves
- Full-pressure lubrication
- Replaceable oil filter
- Dual-stage air cleaner
- V-twin design:
- Excellent power and performance
- Easy starts
- Smooth operation
Flywheel alternator
A flywheel alternator provides plenty of capacity to quickly recharge the battery and power electrical equipment, such as lights or a sprayer:
- 12-amp charging capacity
- Regulated to keep the battery at full charge without risk of overcharging
Fuel tank has large, conveniently located fill opening
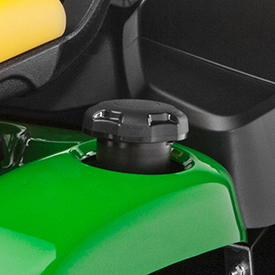 Large fuel-fill opening
 Large, 7.6-cm (3-in.) diameter fuel tank filler opening makes adding fuel easy:
- Located on the left fender
- Helps eliminate spillage
- 7.6-L (2-U.S. gal.) capacity
- A low-fuel light is provided on the tractor dash to tell the operator when it is time to refuel.
107-cm (42-in.) Rear-Discharge Rear-Collect Mower Deck cuts clean
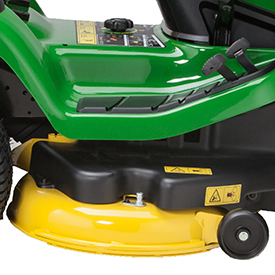 X350R 107-cm (42-in.) Mower Deck
 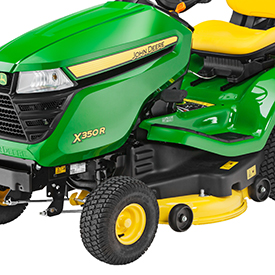 X350R 107-cm (42-in.) Mower Deck
 The innovative design of the 107-cm (42-in.) Edge™ Rear-Discharge Deck combines the best features for reliability and superior performance when mowing, collecting, and mulching grass and leaves:
- The mower deck is stamped from 11-gauge, 3-mm (0.12-in.) steel to provide smooth contours for a quality appearance and excellent performance.
- Easy to install or remove mulch plug is included as standard equipment.
- The included AM147289 blades provide optimal collection/rear discharge and good mulching results in many conditions. For optimal mulching, AM140332 mulching blades are available.
- With no side-discharge chute, the mower can trim on either side for mowing efficiency and convenience.
- A smaller storage area requirement is an additional benefit.
- A standard V-belt and non-timed blade design gives superior reliability and trouble-free operation.
- Offset mower blades permit blade overlap with the use of a standard V-belt drive.
- The blades cut cleanly without contacting each other.
- Cut-height increments of 0.64 cm (0.25 in.) allow for operating the mower at the optimum cutting height.
- An Exact Adjust deck-leveling system is provided to make keeping the deck properly adjusted easy.
The mower deck is contoured and free of obstructions to ensure optimum cutting and bagging performance:
- Grass clippings flow smoothly around the deck and up the chute into the hopper.
- Clipping buildup is minimized to ensure continued high-performance and easy cleanup.
- Special discharge blades (standard equipment) have a large wing to propel grass clippings up the chute and into the hopper.
- Mower fills and packs the 300-L (8.5-bu) hopper with a large volume of grass clippings and/or leaves.
Standard mulch plug
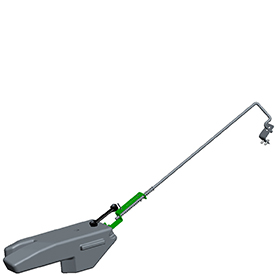 Standard mulch plug
 Mulch plug easily installs in place of hopper:
- A mulch plug is included with the model year 2017 and later X350R as standard equipment (serial number 20,001-).
- Mulch plug is ideal for times when collecting grass clippings and leaves is not desired. The rear hopper can be easily removed, and the mulch plug can be installed.
- Plug closes off opening on bottom of deck so material cannot enter the chute.
- The included AM147289 blades provide optimal bagging and rear discharge performance and good mulching results in many conditions.
- For optimal mulching, AM140332 mulching blades are available.
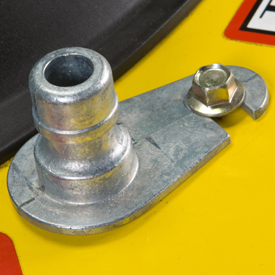 Wash port
 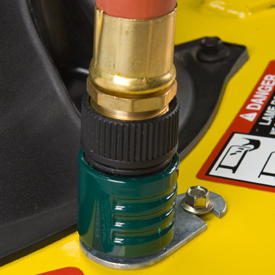 Hose-end adapter for use with wash port
 A wash port is provided on the mower deck. It can be used to supply water to the underside of the deck so it can be easily cleaned after use:
- The wash port is designed for a hose quick-connect fitting.
- Connect the hose to the wash port and operate the mower to clean.
- Using the wash port cleans bottom of deck and chute.
- The wash port works best if used immediately after the mowing job is completed.
- Use of the wash port prevents buildup of material from affecting performance the next time the mower is used.
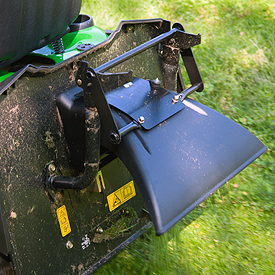 Optional rear deflector
 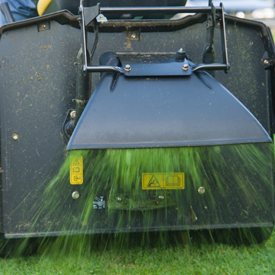 Optional rear deflector in operation
 Optional rear deflector (BM25065) easily installs in place of hopper:
- No tools required for installation
- Deflects clippings in an even pattern behind the tractor
Rear hopper has large capacity and is easy to empty
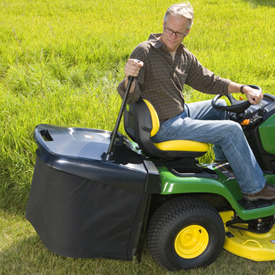 Hopper easily emptied from operator seat
 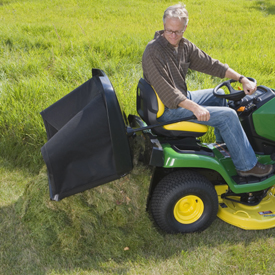 Durable 300-L (8.5-bu) hopper empties completely
 The innovative design of the rear hopper sets a high standard for collecting systems:
- Hopper is constructed of durable fabric for flexibility, where needed.
Hopper shipping
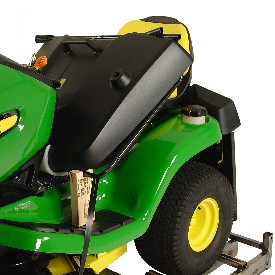 Hopper is nested in tractor for efficient shipping
 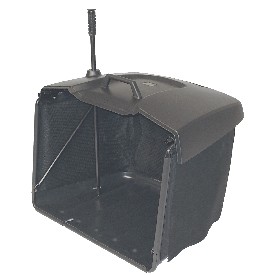 Large-capacity hopper
 The rear hopper is shipped in the returnable shipping crate with the tractor:
- Minimizes shipping cost
- No extra carton material of which to dispose
The hopper is made of durable materials and sealed to keep dust away from the operator.
Four-year or 300-hour bumper-to-bumper warranty is standard
An exclusive 4-year or 300-hour (whichever comes first), single-source, bumper-to-bumper warranty* is standard for all John Deere X300 Series Tractors.
- The warranty is hassle free, with one company handling all the paperwork.
- Premium features of X300 Series Tractors allow for this longer warranty period, with more coverage than comparable tractors.
*Term limited to years or hours used, whichever comes first, and varies by model. See Agriculture and Turf equipment Warranty Statement.at JohnDeere.com.au for details.
Steering is low-effort sector and pinion system
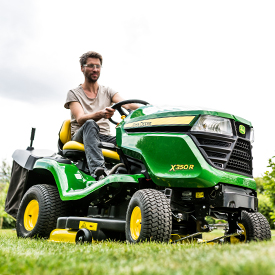 High-quality steering system for easy operation
 A heavy-duty sector and pinion steering system with quality bearings provides easy and precise control for the life of the tractor:
- Tight turning radius of 42 cm (16.5 in.) provides good maneuverability.
- Easy steering promotes mowing efficiency and operator comfort.
Easy steering
Easy steering is important to give the operator an enjoyable mowing experience:
- Large, 36-cm (14-in.) diameter steering wheel gives good leverage for easy turns.
- Larger sector gear gives improved (increased) steering ratio.
- Higher steering ratio results in less effort to turn the wheel.
-
- Ball-joints on both ends of the steering tie rod and drag link maintain accurate steering longer.
- Long steering drag link improves mechanical advantage of the steering system though the full range of motion.
- Sector gear pivots on a shaft rather than a bushing.
- This ensures proper gear mesh and eliminates binding to result in easier steering.
- Greaseable front steering spindles improves wear over time.
Integrated hydrostatic transaxle is efficient
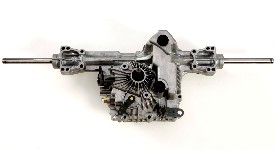 Kanzaki® K46 transaxle
 The Tuff Torq® hydrostatic transaxle encloses the hydrostatic pump and motor rotator groups in the same housing with the differential and axle housings:
- This very efficient design reduces the number of sealing surfaces and minimizes potential for leakage.
- The transaxle is essentially the same as the one used in the X350 Tractor; however, it is reversed and the drive linkage is unique, to work with the rear-discharge system.
When combined with the foot controls, the hydrostatic transmission functions similarly to an automatic transmission in an automobile, so the term automatic is often used to describe it:
- Use of the latest valve designs has significantly reduced the sound level.
- Large pump and motor rotating groups ensure efficient operation and long life.
Freewheeling valve
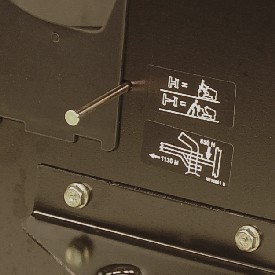 Freewheeling valve
 When it's inconvenient to start the tractor, a freewheeling valve releases the transmission so the tractor can be pushed a short distance. The freewheeling valve control is located under the hopper near the hitch.
Kanzaki and Tuff Torq are trademarks of Kanzaki Kokyukoki Mfg. Co., Ltd.
Controls and display functions are easy to identify and convenient to use
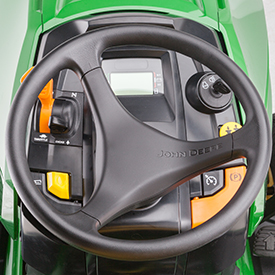 Operator station
  Close-up of display
 The contoured dash has clean, attractive styling and ergonomic controls for easy use:
- Controls are color coded and labeled with English words for easy identification by the operator.
- Controls are logically placed and easy to reach.
- The power take-off (PTO) switch allows the operator to get fingers underneath it, like a T-handle, to pull up for easy activation.
- The reverse implement option (RIO) switch is a yellow button.
- The latch control on foot-lift models and hydraulic-lift control on power-lift models and the park brake latch are pivot levers for low effort.
- Cruise control activation is handled by an automotive-style button.
- Separate engine speed and choke controls make starting and warming up the engine easier in cold weather.
- The choke lever is spring loaded to eliminate the chance the tractor will be unintentionally operated with the choke partially closed.
Display panel
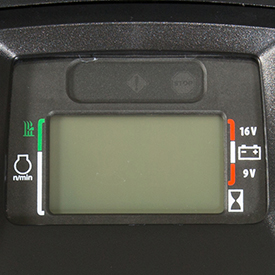
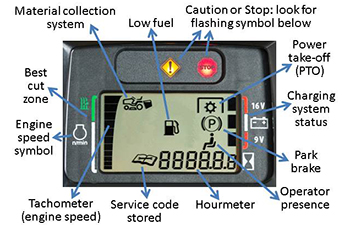 X350R display panel with indicators identified
 Display has the look and feel of a modern automobile. A power-up sequence cycles lights and gauges to indicate they are working:
- Display features dark-cockpit design to minimize operator distractions.
- Display is back lit for night visibility.
- Night visibility is especially useful with snow blower use.
- When the hopper is full, the hopper-full light comes on and a buzzer sounds. The operator needs to manually shut off the PTO.
- Hour meter makes it easy to tell when oil changes and other maintenance should be performed.
- Low-fuel light provides the operator with a noticeable warning when low on fuel.
- A tachometer graphically displays engine speed.
- Target-zone graphics inform the operator of the engine speed range to use for best cut quality.
- An indicator tells the operator when the PTO is operating.
- Bright caution and stop lights capture the operator's attention when important information is on the instrument cluster.
- Damage can be prevented and repair costs can be reduced by addressing problems early.
- Operators are advised of what the problem is if they attempt to operate the mower with unsatisfied PTO, seat, or park brake interlocks.
- The indicators are also useful to identify the reasons the PTO or engine may have shut off when an interlock is unsatisfied.
- Operators are advised if battery voltage is low, normal, or excessive.
- The service indicator light illuminates to indicate a diagnostic error code is stored.
- On-board diagnostics provides trouble codes for use by trained technicians.
- For example, a technician can test switch functionality and circuit continuity without tools.
Twin Touch™ foot control
 Twin Touch foot control
  Cruise control
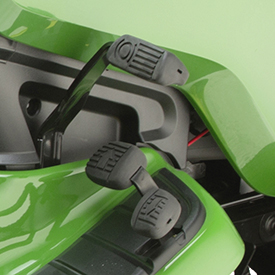
 Twin Touch foot pedals control the speed and direction of travel:
- Automotive-type accelerator control ensures easy operation.
- Operator can change direction without lifting foot off the platform.
- Large pedal surface gives superior operator comfort.
Cruise control
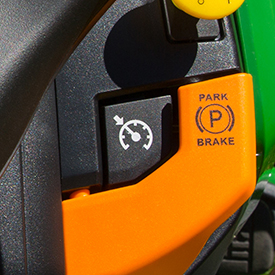
Cruise control is standard equipment:
- To engage, push the cruise-control button and hold until the foot is removed from the forward pedal.
- For emergency stop, the cruise control can be released by pushing on the brake pedal or the forward pedal.
Mower deck height adjustment
 Onboard mower adjusting gauge and wrench
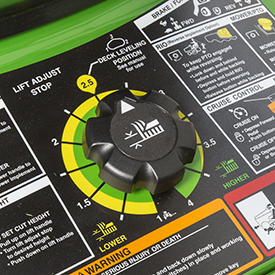
 Rotary dial knob makes adjusting mower cut height quick and easy:
- Provides mower cut heights in 6.4-cm (0.25-in.) increments from 2.5 cm (1 in.) to 8.9 cm (3.5 in.)
- Mower deck returns to same preset height each time it is lowered
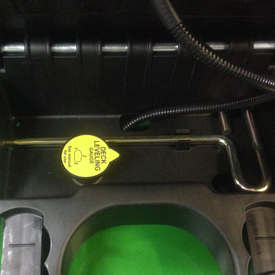 Storage tray under tractor seat
 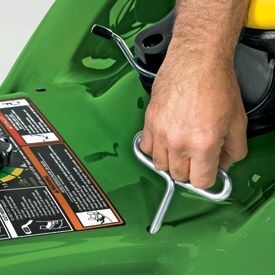 Exact Adjust tool used to level mower deck
 Storage for the onboard deck-leveling gauge and the Exact Adjust tool is provided in the storage tray under the tractor’s seat.
- Exact Adjust ports allow for easy and accurate leveling of the mower deck for optimum mowing performance.
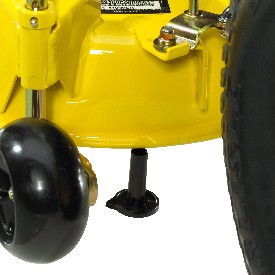 Deck-leveling gauge placed under deck
 Foot-pedal lift system
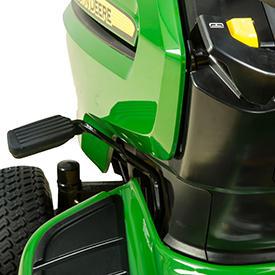 Foot-pedal lift system
 Pushing with the foot to raise the mower or implement is less strenuous for many operators:
- The easy-to-use raised position lock operates similarly to the park brake lock.
- The foot pedal is out of the way and not likely to catch on bushes and tree limbs when mowing.
- The mower deck returns to same preset height each time it is lowered.
- A spring is provided to minimize lift effort.
- An optional BM24810 supplemental lift-assist spring kit (X350R) is required for snow blower use on the X350R.
- The mower will not be inadvertently locked in the raised position when mowing through ditches.
- When installing or removing a mower or front equipment raised by the foot lift system, spring tension may be removed from the connection points by pulling rearward on the lift pedal and raising the lift latch to hold the pedal in the rearward position.
Parking brake control
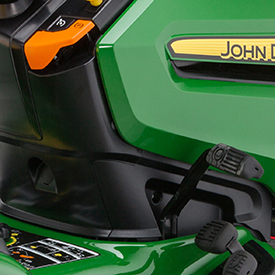 Parking brake
 Depressing brake pedal applies internal wet disk brakes (increased durability and longer life) for safe stopping.
Parking brake control is conveniently located for easy access; holds brake pedal securely in locked position.
Electric PTO clutch is easy and convenient to use
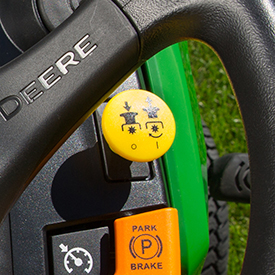 Electric PTO switch
 The heavy-duty electric PTO clutch is operated with a convenient dash-mounted switch.
Heavy-duty PTO clutch
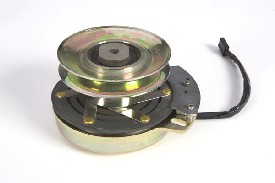 PTO clutch
 The PTO clutch is designed to operate through many on/off cycles.
RIO and interlock switches
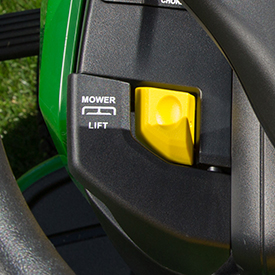 Reverse implement switch
 Using RIO
CAUTION: Children or bystanders may be injured by rotating blades. Before traveling forward or rearward:
- Carefully check the area around the machine.
- Disengage the mower before backing up.
NOTE: Operating the mower while backing up is strongly discouraged. RIO should be used only when operating another attachment or when the operator deems it necessary to reposition the machine with the mower engaged.
- Stop forward travel. Allow attachment to run.
- Look down and behind the machine to be sure that there are no bystanders.
- Push and hold in the reverse implement switch while depressing the reverse pedal slightly.
NOTE: If the attachment stops while positioning the machine, return the mower engagement (PTO) switch to off position. Repeat this procedure from the beginning. - Release the reverse implement switch and reposition the machine as the machine begins to move rearward.
- Resume forward travel. The attachment should continue operating.
- Repeat procedure to position the machine again.
Interlock switches
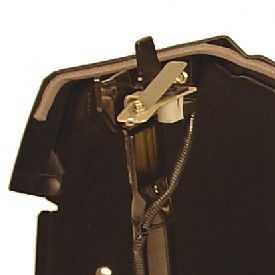 Switch senses if hopper is installed
 A switch senses if the hopper is installed. If the hopper is not installed and the PTO switch is actuated, the PTO will not operate.
A brake interlock switch is provided so the tractor does not start unless the brake is depressed or the parking brake set.
A tractor seat switch turns off the PTO if the operator leaves the tractor seat; it also shuts down the engine if the park brake is not set and the operator leaves the seat.
Either the operator needs to be in the seat or the hopper or deflector needs to be installed for the engine to run.
Modern styling is eye-appealing and functional
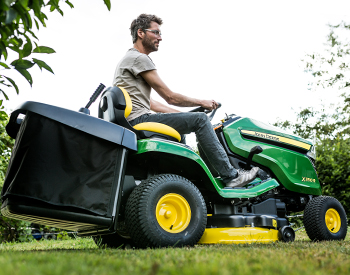 Attractive styling
 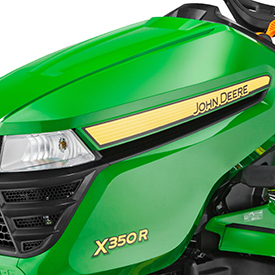 Hood air-intake louvers
 Smooth, rounded contours present a modern, stylish appearance:
- Hood styling incorporates efficient full-length air-intake louvers on each side, rather than on the top, for cooler engine operation and lower operator station sound levels.
- Hot air is vented out the front grille, away from the operator.
- The fully enclosed hood is made of molded-in-color material.
- Reduces sound
- Will not rust or dent
- Distinctive grille and large, one-piece fender deck complete the styling package.
Two high-quality headlights give excellent visibility
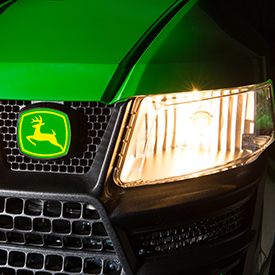 Optimum lighting pattern
 Headlights are standard equipment on all models:
- Two 27-W bulbs provide excellent lighting for good visibility during evening operation.
- A headlight position on the ignition switch makes it easy to operate the headlights.
- The headlights are designed to provide an optimum lighting pattern for mowing and snow removal.
Operator station is comfortable and convenient
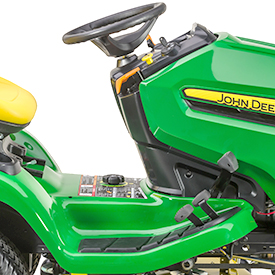 Operator station
 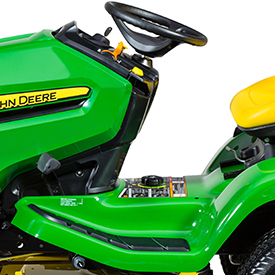 Operator station
 The operator station is designed for operator comfort and ease of using controls:
- A large, 36-cm (14-in.) diameter steering wheel is comfortable to use and minimizes steering effort.
- Full-length foot mats provide comfort for the operator and protect the footrest area.
Comfortable seat
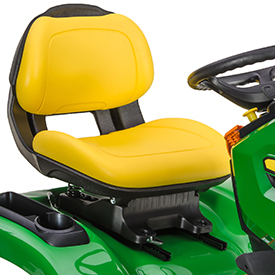 Comfortable open-back seat
 An open-back 38-cm (15-in.) high-back seat provides a comfortable, smooth ride and good support for the operator:
- Seat travel of 17 cm (6.6 in.) with 15 positions allows the operator to be seated comfortably and easily operate the controls.
- Seat can be easily adjusted fore and aft by the operator while sitting on the seat.
- Open-back design allows air circulation to keep the operator's back cool and dry for a more comfortable ride.
- Grasp at the top of the seat is conveniently located for use when tilting the seat up to protect it from the weather.
Adjustable seat suspension
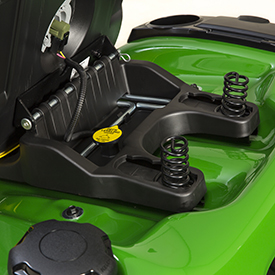 Seat suspension with springs in rear position
 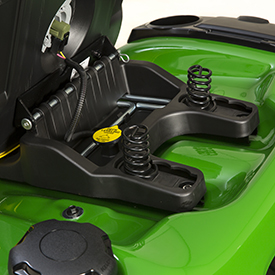 Seat suspension with springs in forward position
 The seat suspension is adjustable, without tools, for the weight of the operator:
- Springs are adjustable fore and aft to any of three positions.
- No tools required
- Allows fine-tuning of the suspension for the operator's weight
- Back position for more support for heavier operators
- Tool tray is designed into the seat base.
- Can be used to store gloves, small tools, etc.
- Provides storage location for Exact Adjust tool and deck-leveling gauge
Cup holder and toolbox
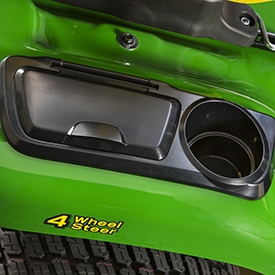 Cup holder and covered toolbox on fender
 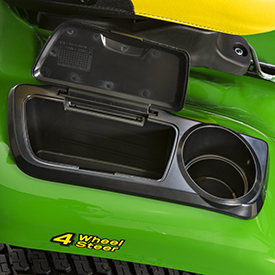 Covered toolbox with open cover
 A cup holder and covered toolbox are located on the fender for operator convenience:
- The cup holder holds a variety of container sizes.
- Toolbox provides convenient storage.
- Toolbox cover snaps closed to provide protection for loose tools, cell phones, etc.
- Cup holder and toolbox are constructed of durable acrylonitrile butadiene styrene (ABS) plastic.
Removable plug for optional 12-V outlet
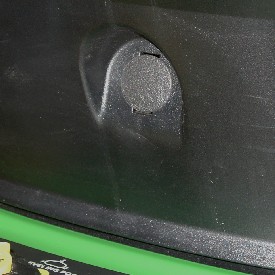 Location for optional 12-V outlet
 A removable plug on the console, in front of the operator, provides a convenient location for the optional 12-V outlet and makes installation easy.
- Convenient for plugging in cell phone charger and other electric devices
- Can be used to operate electric rear equipment, such as a sprayer or spreader
12-V fast connector
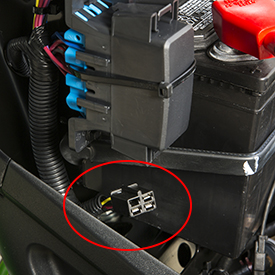 Fast connector location
 A mid-vehicle, 12-V fast connector, located under the tractor’s fuse box, is included as standard equipment to reduce initial installation time for some attachments that operate on 12-V power from the tractor:
- The four-cavity connector includes battery, ground, and key switch terminals and is turned on and off with the ignition switch.
Serviceability convenience is built in
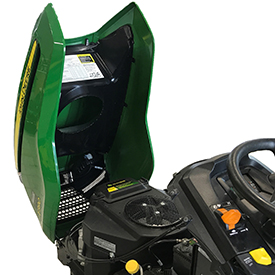 One-piece hood is easy to open
 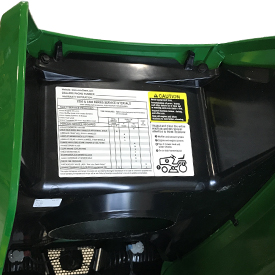 Service interval decal located under hood
 The one-piece hood opens easily to permit checking and servicing the engine:
- Important service points are located within easy reach.
- A service-interval decal is provided inside the tractor hood for convenience when servicing the tractor.
- The high-quality engine used in the X350R does not require an 8-hour oil and filter change because improvements in the manufacturing process and quality of parts, components, and oils have eliminated the need for the short interval oil change requirement.
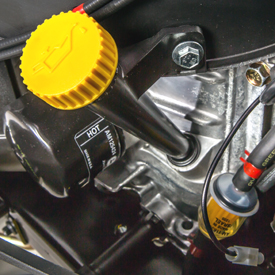 Easy-to-service engine fuel and oil filters
 The engine fuel and oil filters, the oil check/fill tube, and the oil drain tube are exposed for serviceability when the hood is opened.
Hopper adjustment and removal
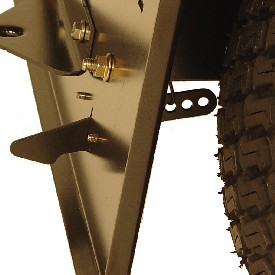 Adjustable hopper latch
 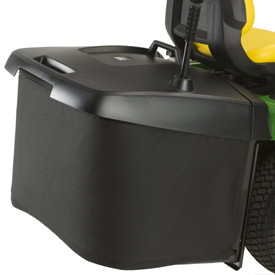 Hopper is easily removed and reinstalled
 Hopper latch is easily adjustable for operator preference and conditions:
- Spring can be located in any of three holes.
- More latching effort is required for hilly or rough operating conditions.
The hopper is easily removed by using the rear handle to raise the back end of the hopper 25 degrees, or about 13 cm (5 in.), and then using both handles to lift the hopper vertically out of the notches:
- No tools are required.
- There is nothing to disconnect.
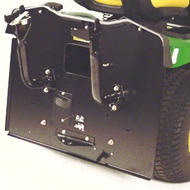 Hopper removed
 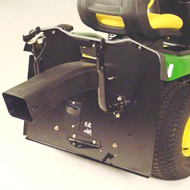 Chute shown pulled out part way
 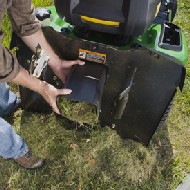 Chute is easily removed and cleaned if necessary
 The chute can be easily pulled out and removed:
- Chute must be at least partially pulled out before removing the mower deck.
- Removing the chute makes cleaning it easy.
Exact Adjust ports and onboard deck-leveling tools make precise deck adjustments easy
 Deck-leveling gauge and hex adjusting tool stored under tractor seat
 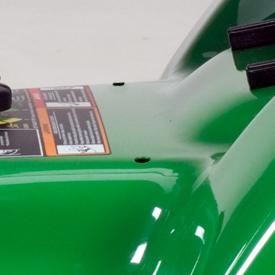 Exact Adjust access holes
 A mower deck must be level side-to-side and properly adjusted front-to-rear to give the best cutting performance. A removable onboard deck-leveling gauge and a hex-key tool are provided to make adjustment easy. They are securely stored under the tractor seat.
Exact Adjust leveling ports are provided on each side of the operator platform above the mower-level adjusting bolts. With the hex-shaped tool, they provide convenient access to allow quick and easy adjustment of the mower for the best-cut quality of cut.
The Exact Adjust feature is standard on all Select Series™ X300 and X500 Tractors:
- There is no need to reach under the fender deck while making the mower-level adjustment.
- Onboard deck-leveling gauge, Exact Adjust ports, and the hex tool work together.
- Level the mower deck side to side
- Set the correct amount of rake (front-to-back deck orientation)
- Calibrate the cutting height to the cut-height adjusting knob setting
- Exact Adjust simplifies leveling the mower deck if equipped with a Power Flow™ blower.
- To give the best cut, mower level should be adjusted if alternately mowing with and without blower installed. The Exact Adjust feature makes this easy.
 Deck-leveling tool placed under deck
  Using included ball-hex tool to level mower deck
 Consult the operator's manual for the correct adjusting procedures for each tractor model. Basic adjusting steps to properly level the mower deck include:
- Park the tractor on a level surface.
- Inflate tires to the correct pressure.
- Consult the label for the cutting-height knob that is located on the console of the machine. This label shows deck-leveling position and location of deck-leveling adjustment points.
 Cut height adjusting knob
 - Set mower cutting-height knob to the correct deck-leveling position.
- Adjust mower wheels as necessary so they do not contact the ground surface.
- Remove the onboard deck-leveling gauge that is located under the seat.
- Using the Exact Adjust ports and tool, adjust mower deck side-to-side level so the deck-leveling gauge just slips under the left and right lower deck rim at the designated adjustment points. The location of adjustment points varies slightly between decks.
- Left- and right-rear adjustment points are under the deck rim near the rear mower wheels, if equipped.
- Adjust mower deck front-to-back level, if necessary.
- Loosen rear nuts equally on each side of front lift rod.
- Turn front nut equally on each side clockwise to raise front of mower or counterclockwise to lower it until gauge just slips under the front adjustment point.
- Tighten rear nuts after adjustment is complete.
- Return the gauge to its storage position.
NOTE: The adjusting tool supplied with the tractor is an 8-mm ball-hex key, part number M162737. The rounded end allows for some misalignment with the bolt as the deck is adjusted.

